Installing an application on an iPhone or iPod touch
requires iPhone Developer membership. After you have a membership,
installing an application is not difficult, as Apple’s Developer Portal
provides step-by-step instructions.
Membership
A basic membership in the iPhone
Dev Center on the Developer Connection web site is a prerequisite to
downloading the iPhone SDK. However, to install applications and eventually sell applications on the App Store requires
membership in the iPhone Developer Program. Apple offers two membership
types: corporate and individual. You must apply, pay a $99 fee, and
receive acceptance before becoming a full individual member. After
becoming a member, you are granted access to the iPhone Developer
Program’s Portal. This site is where you obtain certificates, assign new
devices, create application IDs, create provisioning profiles, and
submit an app to the App Store for approval.
If you are not a registered, paid iPhone developer, you should become one now. Go to the iPhone Dev Center (http://developer.apple.com/programs/iphone/) for complete instructions. You cannot debug apps on your device until you register.
Certificates, Devices, Application IDs, and Provisioning
A certificate is the first
thing that is required. Log in to your iPhone Developer Program account
and click the iPhone Provisioning Portal link. The Provisioning Portal
is where you’ll create a signing certificate, register devices, create
provisioning certificates, and more (Figure 1).
Apple has provided lots of online help, including videos, for the
Provisioning Profile. Take a little time to go through their
documentation before proceeding.
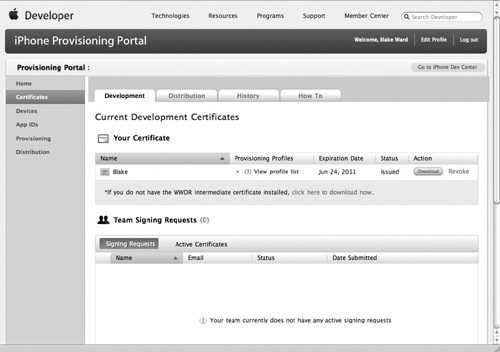
You obtain your certificate by following the instructions on the How To tab in the portal’s Certificates tab.
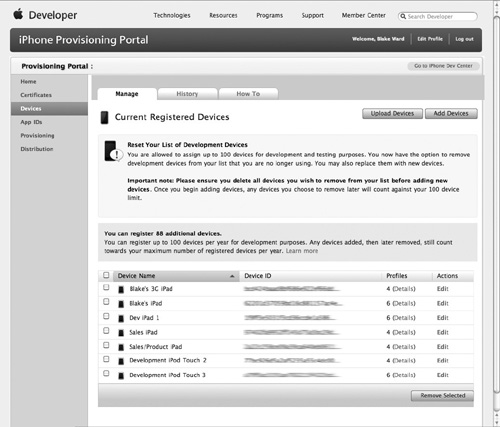
After
obtaining the certificate, you must register the devices you wish to
use for debugging. You’ll need brief access to each of these devices to
retrieve its unique device ID, but otherwise these could be iOS devices
that belong to your friends or anyone you want to use for testing your
new app (Figure 2). As with certificates, complete instructions are provided on the How To tab.
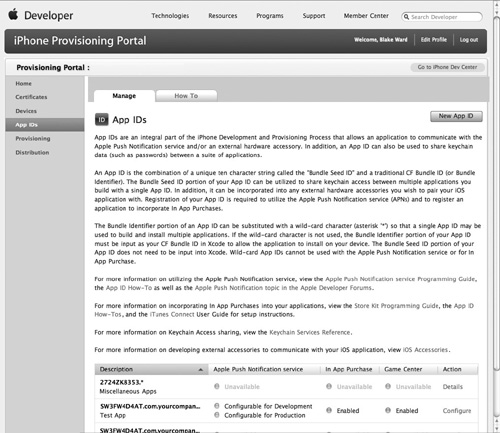
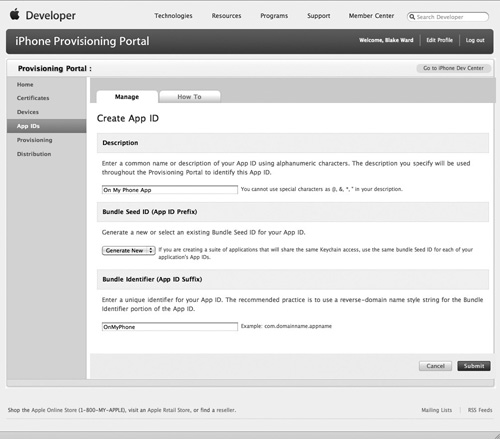
After registering your
devices, the next step is to create an App ID for each of your
applications. Any application you wish to test on a device must have an
App ID (Figure 3).
If an app will use Apple’s Push Notifications or require In App
purchasing, then it must have a unique App ID. For other applications
you can create a wildcard App ID that ends with a * and use it for
multiple apps.
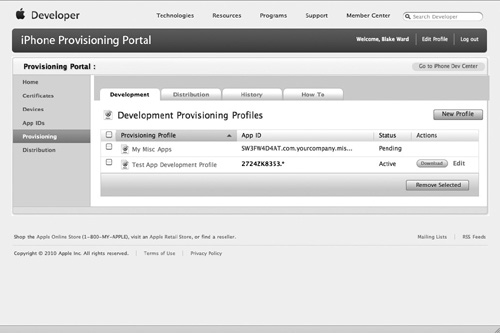
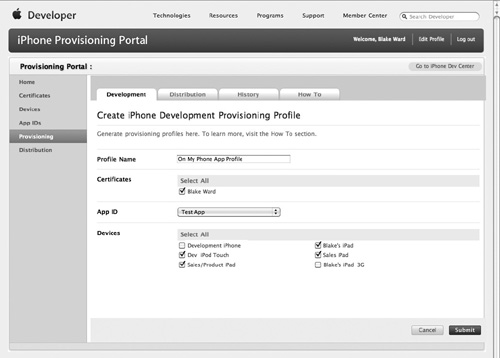
After obtaining the App ID, you must obtain a provisioning profile (Figure 4).
A provisioning profile essentially bundles together a signing
certificate, a set of devices, and an App ID. It will be installed on
your device so that your app can be installed and tested. The
provisioning profile will be installed on your device(s) and allows you
to install a particular application on a particular device.
Apple’s Developer Portal has a
complete discussion of the provisioning process; the process is not
difficult. What you can do when learning the process is to open two
browser windows, one where you work through the steps and the other to
skim the instructions as needed. In the following example, we take you
through registering and installing a simple application on an iPhone.
Create
a new View-based Application named OnMyPhone. Keep track of the Company
Identifier and Product Name so that you can create an App ID in the
iPhone Provisioning Portal that matches. Log in to the iPhone Developer Program Portal. Click the Certificates tab. If you haven’t installed your certificate, do so now. These steps assume a certificate (see Figure 1). Click the Devices tab. If you haven’t installed your devices, do so now. These steps assume a registered device (see Figure 2). Click the App IDs tab and add the application (see Figure 3). Click the Add ID button on the page’s right, and add the OnMyPhone application (Figure 5). You’ll need to match the Bundle Identifier to what you used in Step 1.
Click the Provisioning tab and click the New Profile button on the page’s right (see Figure 4). Complete the form; be certain you select the certificate and the device you want to provision (Figure 6).
Click
Submit, and you return to the Provisioning page. The Provisioning
Profile’s status for My On My Phone Profile should say “Pending.”
Refresh the page until the status has an “Active” status. You are
usually quickly granted a profile. Download
the profile by clicking the Download button next to the profile. The
profile should have a title like “On_My_Phone_Profile.mobileprovision.”
Move it to a safe location. Ensure your device is connected to your computer. Return to Xcode. From the Window menu, select Organizer. If your device is attached, it should appear under DEVICES (Figure 7).
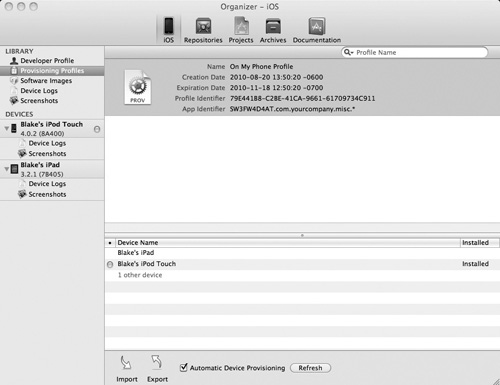
Drag the provision file to the Provisioning list. With your iOS device attached, Xcode will probably default to building/running on your device. If not, choose OnMyPhone (your device name) from the pull-down menu at the top of the project window instead of OnMyPhone (iPhone Simulator 4.2). Note
With new projects, Xcode
will default to building for the latest version of the SDK. This is
almost always what you’ll want. You should build your app for the latest
SDK version but still specify in the build settings that it will run on
a range of iOS versions older than the SDK if you don’t absolutely
require a new feature only available in the latest OS.
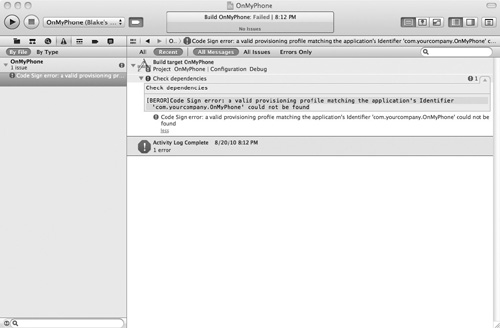
You
might receive an error the first time. If the build fails, click the
Issues button in the navigation pane (the one with an exclamation point)
and then click the issue to see details (Figure 8).
If the application identifier that you chose when you created the
project doesn’t match the one in the App ID of the provisioning profile,
you’ll get a signing error. If that happens, you can change the
application’s identifier by editing the file OnMyPhone-Info.plist (Figure 9) or you can go back to the Provisioning Portal and edit to create a new App ID or profile.
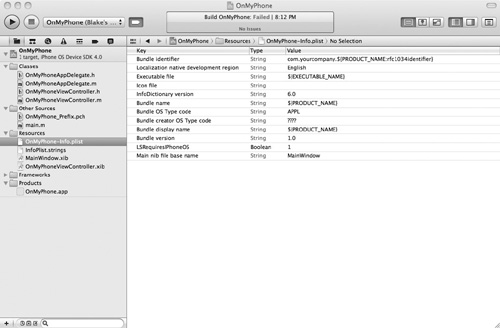
Close the Project Info window and open Info.plist. Change the bundle identifier to OnMyPhone. Click Run, and the application should install and run on your device.
|